People in ancient Mesopotamia didn't have the luxury of driving over to Blick art supplies and buying a clay that had exactly the physical properties they wanted. When you dig your own local clay, you have to consider including additives to change how "plastic" the clay is, how strong it is versus how easy it is to work, how well it dries and avoids cracks, etc.
TEMPERING
"Tempering" clay is adding some amount of non-plastic material to a clay body to change its working properties. Namely, appropriately tempered clay is supposed to crack less easily and shrink less (which also makes it more thermally shock-resistant) than non-optimally-tempered clay. You can make temper out of:
- Crushed shells
- Crushed old bits of already-fired pottery
- Sand (if it has sharp-edged grains)
- Really, anything else that can take the heat of a kiln and that has particles with "bite" to them
(By the way: I'm going to be "cheating" on my "from scratch" rule to start early on at various steps, only as I am learning. Like by using hardware store pots. Later, once I know what works, I will go back and do things like make grog out of pottery I made myself instead!)
MAKING THE TEMPER
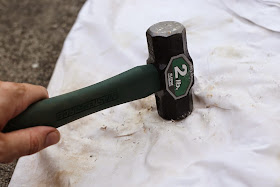
First, I crushed up the pot between an old sheet for eye-safety (use goggles as well!). You'll probably have to re-fold the sheet over and keep hitting several times to get enough small pieces:
This leaves you with a variety of different sized bits at any given point. Once I had them pretty small, I poured a handful of them all into this burlap bag, to sift to a common size (I had no idea if this is the optimal size ... SCIENCE!), and sifted them onto a clean area:
This is now my (unusually fine) grog. Apparently people tend to use larger grain sizes than this, but I didn't know that at the time. I might get better results if I try again with a larger mesh.
TESTING THE TEMPER
But anyhow, the next step is to take some test clay and divide it into some equally sized bits. We are going to add different percentages of grog to each bit and see which proportion of grog gives us the optimal working characteristics for this particular local clay, going in 10% increments (I just did it by apparent volume). Here are my clay bits and grog before being mixed:
(Don't know why it looks ashy gray here. It's the same reddish grog as above.)
Once you have thoroughly mixed a set of 0% 10% 20% 30% 40% 50%, etc. balls of clay/grog, smash them into discs. Make note of how easy or difficult they are to work with while still moist.
Then wait for them to fully get bone-dry. This means "dry looking but also room-temperature when touched, which indicates no more deep evaporation is happening, either." Whichever mixture cracks and shrinks the least is the proportion you want. In my case, any amount of grog seemed to be a bad thing (0% performed best)!
From left side, going clockwise: 60% grog, 50%, 40%, 30%, 20%, 10%, 0% (pure clay):
After drying, the situation hadn't changed. The pure clay didn't crack at all, and the tempered clays all got worse.
Since doing this test, I have tested another few mixtures for furnace lining (see future posts!) but all of my test items themselves are pure, un-tempered clay. That doesn't necessarily mean that's the best solution. If I were to be very thorough, I would want to test other types of tempers (shells? sand?) and also different mesh sizes of temper.


